


Game Information
Corroboree Group Oval Manuka
| fourth Quarter | |||
|---|---|---|---|
| Time | Team | Play | Score |
| 33:39 |  | J. Kelly Behind | 81 - 113 |
| 32:18 | | A. Cadman Goal | 80 - 113 |
| 29:34 |  | S. Davidson Goal | 74 - 113 |
| 27:14 | | J. Hogan Goal | 74 - 107 |
| 25:26 | | T. Green Goal | 68 - 107 |
| 22:25 | | T. Bedford Goal | 62 - 107 |
| 21:46 | | J. Riccardi Behind | 56 - 107 |
| 17:26 | | A. Naughton Goal | 55 - 107 |
| 14:52 | | R. West Goal | 55 - 101 |
| 12:55 | | T. Greene Goal | 55 - 95 |
| 9:03 | | S. Davidson Behind | 49 - 95 |
| 7:57 | | Rushed | 49 - 94 |
| 7:16 | | Rushed | 49 - 93 |
| 4:56 | | B. Khamis Goal | 49 - 92 |
| third Quarter | |||
| Time | Team | Play | Score |
| 30:02 | | C. Ward Behind | 49 - 86 |
| 27:10 | | M. Bontempelli Behind | 48 - 86 |
| 19:09 | | R. Lobb Goal | 48 - 85 |
| 13:19 | | E. Richards Goal | 48 - 79 |
| 12:36 | | Rushed | 48 - 73 |
| 10:35 | | M. Kennedy Goal | 48 - 72 |
| 8:11 | | J. Harmes Goal | 48 - 66 |
| 6:02 | | R. West Goal | 48 - 60 |
| 3:18 | | A. Naughton Behind | 48 - 54 |
| second Quarter | |||
| Time | Team | Play | Score |
| 35:12 | | T. English Goal | 48 - 53 |
| 31:48 | | T. Greene Behind | 48 - 47 |
| 29:36 | | T. Bedford Goal | 47 - 47 |
| 25:24 | | J. Hogan Goal | 41 - 47 |
| 24:01 | | T. Greene Behind | 35 - 47 |
| 22:49 | | J. Harmes Goal | 34 - 47 |
| 18:37 | | J. Hogan Behind | 34 - 41 |
| 16:59 | | T. Liberatore Behind | 33 - 41 |
| 14:37 | | R. West Goal | 33 - 40 |
| 10:44 | | J. Johannisen Goal | 33 - 34 |
| 8:55 | | J. Harmes Goal | 33 - 28 |
| 7:38 | | J. Riccardi Goal | 33 - 22 |
| 5:40 | | R. Lobb Goal | 27 - 22 |
| 4:28 | | T. Greene Goal | 27 - 16 |
| 3:03 | | R. Lobb Behind | 21 - 16 |
| first Quarter | |||
| Time | Team | Play | Score |
| 29:41 | | J. Stringer Behind | 21 - 15 |
| 25:19 | | J. Harmes Goal | 20 - 15 |
| 24:50 | | Rushed | 20 - 9 |
| 23:26 | | J. Riccardi Goal | 20 - 8 |
| 22:20 | | M. Bontempelli Behind | 14 - 8 |
| 21:32 | | F. Callaghan Behind | 14 - 7 |
| 16:00 | | J. Stringer Behind | 13 - 7 |
| 14:16 | | H. Thomas Goal | 12 - 7 |
| 6:36 | | J. Riccardi Goal | 6 - 7 |
| 3:53 | | R. Sanders Behind | 0 - 7 |
| 2:39 | | M. Kennedy Goal | 0 - 6 |
Round 13 of the 2026 AFL season kicks off with a Thursday night blockbuster between Adelaide and Geelong. It concludes on Monday afternoon with what is sure to be an emotional King's birthday contest between Collingwood and Melbourne at the MCG.
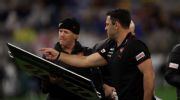
Essendon caretaker Dean Solomon has shut off his social media as noise continues to build around James Hird leading the race to take over as coach.
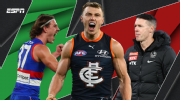
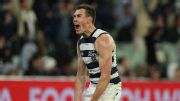
Patrick Cripps had the ultimate captain's moment and a Dogs defender announced himself to the world. But Craig McRae's Pies and the Lions are in strife. Here's whose stocks are up and down after Round 12.
The Brownlow Medal is the highest individual honour in the AFL. In 2026, ESPN is giving you an advantage with our one-of-a-kind predictor.
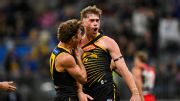
Harley Reid was instrumental in the West Coast Eagles' big win over an embattled Essendon.
The Coleman Medal is awarded to the player who kicks the most goals throughout the AFL home and away season. Who is on track to win the award in 2026?
| POS | Team | Pts. | % | Form |
|---|---|---|---|---|
| 1 |
 FRE FRE
|
44 | 135.2 | WWWWW |
| 2 |
 SYD SYD
|
40 | 152.4 | WWWLW |
| 3 |
 HAW HAW
|
34 | 114.8 | DLLWW |
| 4 |
 GEEL GEEL
|
32 | 121.9 | WWWWL |
| 5 |
 SUNS SUNS
|
28 | 116.9 | LWWWL |
| 6 |
 MELB MELB
|
28 | 101.8 | LWWLL |
| 7 |
 WB WB
|
28 | 93.7 | LWLWW |
| 8 |
 ADEL ADEL
|
24 | 107.9 | LWWWL |
| 9 |
 BL BL
|
24 | 103.9 | WWLLL |
| 10 |
 GWS GWS
|
24 | 103.2 | LWLWW |
| 11 |
 COLL COLL
|
22 | 99.9 | DLLWL |
| 12 |
 STK STK
|
20 | 102.3 | WLWLL |
| 13 |
 NMFC NMFC
|
20 | 97.6 | LLLLW |
| 14 |
 CARL CARL
|
16 | 87.5 | LLWWW |
| 15 |
 WCE WCE
|
16 | 70.0 | LLWLW |
| 16 |
 PORT PORT
|
12 | 100.9 | WLLLL |
| 17 |
 RICH RICH
|
8 | 60.4 | WLLWL |
| 18 |
 ESS ESS
|
4 | 70.5 | LLLLL |